Hugo To Github
Table of Contents
Meng-Hosting di Github
Di tulisan ini, saya akan menunjukkan cara hosting static-site Hugo yang sudah dibuat sebelumnya ke Github. Jadi, sebelum lanjut membaca tutorial ini, ada 3 persyaratan yang harus sudah dipenuhi:
- Punya akun Github (kalau belum punya silakan buat dulu).
- Komputer/laptop-nya sudah terinstall git (kalau belum silakan install).
- Sudah membuat website Hugo sebelumnya (kalau belum, silakan buat dulu, tutorialnya bisa mengikuti tulisan saya sebelumnya).
Saya akan menunjukkan 10 langkah dalam mem-publish atau meng-hosting static-site Hugo kita ke Github1. Berikut langkah-langkahnya:
Langkah 1:
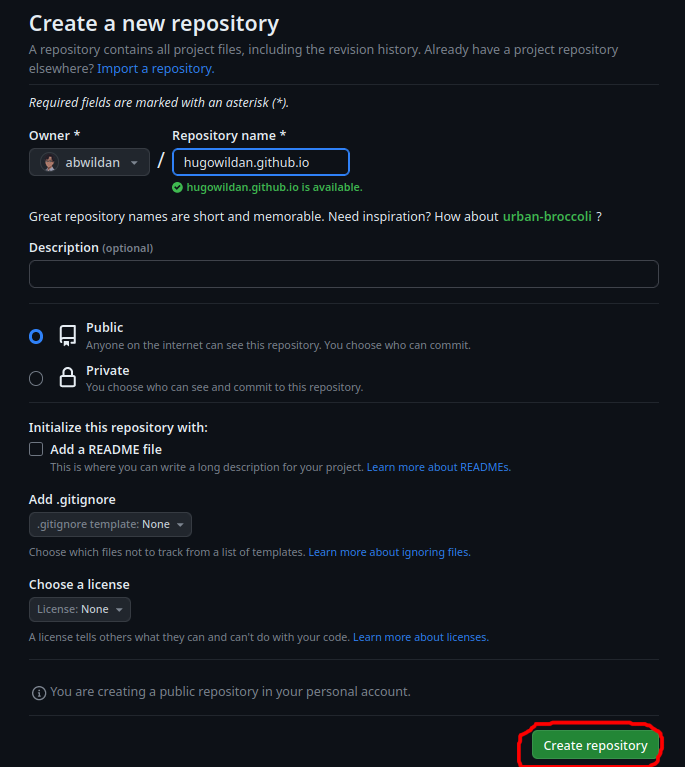
Buat sebuah repositori baru di Github.
Di Tab “Repository” -> Klik “New”.
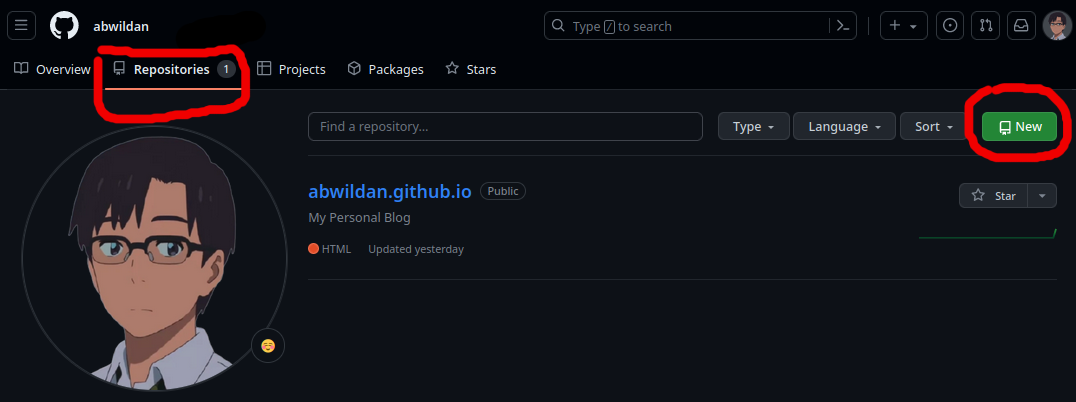
Misanya, saya akan namakan repositori baru saya dengan “githubwildan.github.io”. Kemudian klik “Create Repository”.
Langkah 2:
Push repositori lokal kita ke Github.
Jangan lupa, kalau mau konten post kita tampil, kita terlebih dahulu harus merubah value “draft” post-nya dari
truekefalse.
Pastikan kita di folder root direktori proyek Hugo kita. Kemudian, ketikkan perintah berikut:
git status
git add .
git commit -m "commit pertama ke github"
git branch -M main
git remote add origin git@github.com:abwildan/hugowildan.github.io.git
git push -u origin main
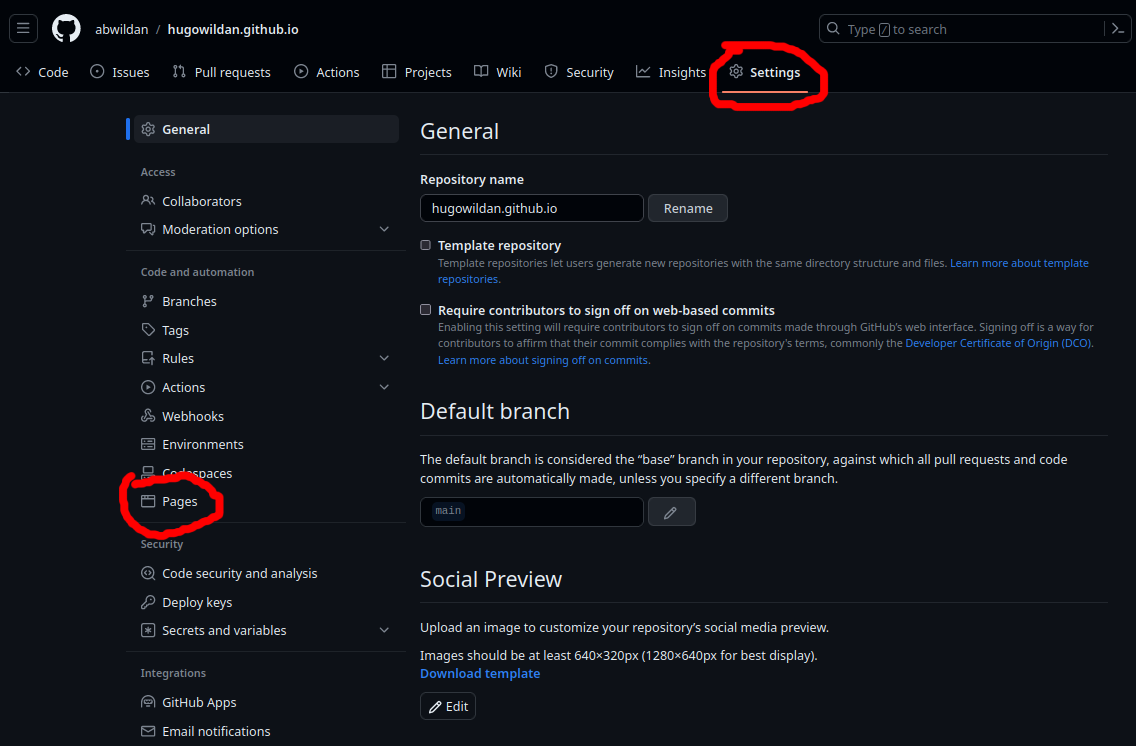
Langkah 3:
Kita ke halaman Github repo. Kemudian dari main menu, kita klik menuju ke “Setting” -> “Pages”.
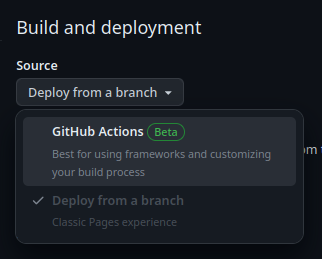
Langkah 4:
Ganti “Source” di bagian “Build and deployment” ke “Github Action”.
Langkah 5:
Buat file kosong baru di lokal repositori kita.
mkdir -p .github/workflows
touch .github/workflows/hugo.yaml
Langkah 6:
Copy-paste kode YAML berikut ke file hugo.yaml yang sudah dibuat sebelumnya. Kita dapat menyesuaikan nama branch dan versi Hugo-nya.
# Sample workflow for building and deploying a Hugo site to GitHub Pages
name: Deploy Hugo site to Pages

on:
  # Runs on pushes targeting the default branch
  push:
    branches:
      - main

  # Allows you to run this workflow manually from the Actions tab
  workflow_dispatch:

# Sets permissions of the GITHUB_TOKEN to allow deployment to GitHub Pages
permissions:
  contents: read
  pages: write
  id-token: write

# Allow only one concurrent deployment, skipping runs queued between the run in-progress and latest queued.
# However, do NOT cancel in-progress runs as we want to allow these production deployments to complete.
concurrency:
  group: "pages"
  cancel-in-progress: false

# Default to bash
defaults:
  run:
    shell: bash

jobs:
  # Build job
  build:
    runs-on: ubuntu-latest
    env:
      HUGO_VERSION: 0.115.4
    steps:
      - name: Install Hugo CLI
        run: |
          wget -O ${{ runner.temp }}/hugo.deb https://github.com/gohugoio/hugo/releases/download/v${HUGO_VERSION}/hugo_extended_${HUGO_VERSION}_linux-amd64.deb \
          && sudo dpkg -i ${{ runner.temp }}/hugo.deb
      - name: Install Dart Sass
        run: sudo snap install dart-sass
      - name: Checkout
        uses: actions/checkout@v3
        with:
          submodules: recursive
          fetch-depth: 0
      - name: Setup Pages
        id: pages
        uses: actions/configure-pages@v3
      - name: Install Node.js dependencies
        run: "[[ -f package-lock.json || -f npm-shrinkwrap.json ]] && npm ci || true"
      - name: Build with Hugo
        env:
          # For maximum backward compatibility with Hugo modules
          HUGO_ENVIRONMENT: production
          HUGO_ENV: production
        run: |
          hugo \
            --gc \
            --minify \
            --baseURL "${{ steps.pages.outputs.base_url }}/"
      - name: Upload artifact
        uses: actions/upload-pages-artifact@v1
        with:
          path: ./public

  # Deployment job
  deploy:
    environment:
      name: github-pages
      url: ${{ steps.deployment.outputs.page_url }}
    runs-on: ubuntu-latest
    needs: build
    steps:
      - name: Deploy to GitHub Pages
        id: deployment
        uses: actions/deploy-pages@v2
Langkah 7:
Commit perubahan barusan ke repo lokal dan jangan lupa juga push ke Github.
git status
git add .
git commit -m "menambahkan file .github/workflows/hugo.yaml"
git push
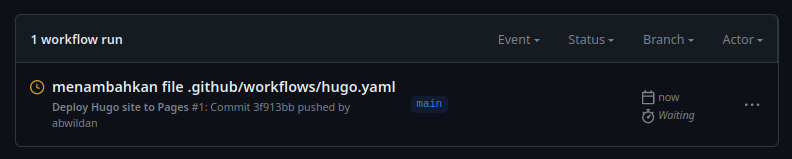
Langkah 8:
Di tab “Actions”, kita akan melihat seperti ini:
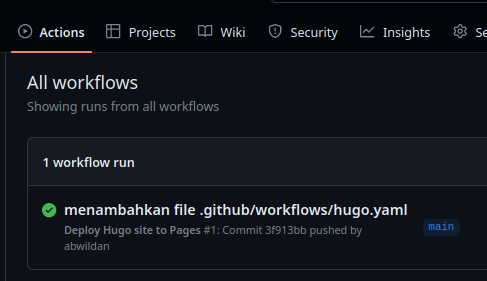
Langkah 9:
Kalau Github sudah selesai mem-build dan men-deploy website kita, warna indikator statusnya akan berubah menjadi hijau seperti ini:
Langkah 10:
Kita dapat melihat live website Hugo kita sudah ter-hosting di Github di link “https://abwildan.github.io/hugowildan.github.io/"
. Artinya, siapapun sekarang bisa mengunjungi website kita!
Selanjutnya, kapanpun kita mem-push perubahan dari repositori lokal, Github akan nge-rebuild website kita dan men-deploy perubahan-perubahannya.